0.前言
前面一篇文章中,我们主要介绍了ngClass的使用,这一篇文章中,我们简单介绍下ngStyle的用法。
1.实现
1.1基本用法
HTML:
 <div [ngStyle]="{'background-color': 'green'}">
        <p>窗前明月光</p>
 </div>
效果:

1.2可以写多个(十分不建议)
HTML:
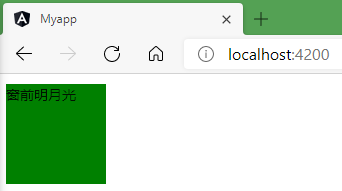
    <div [ngStyle]="{'background-color': 'green','height':'100px', 'width':'100px','margin':'10px'}">
        <p>窗前明月光</p>
    </div>
效果:

1.3动态表示
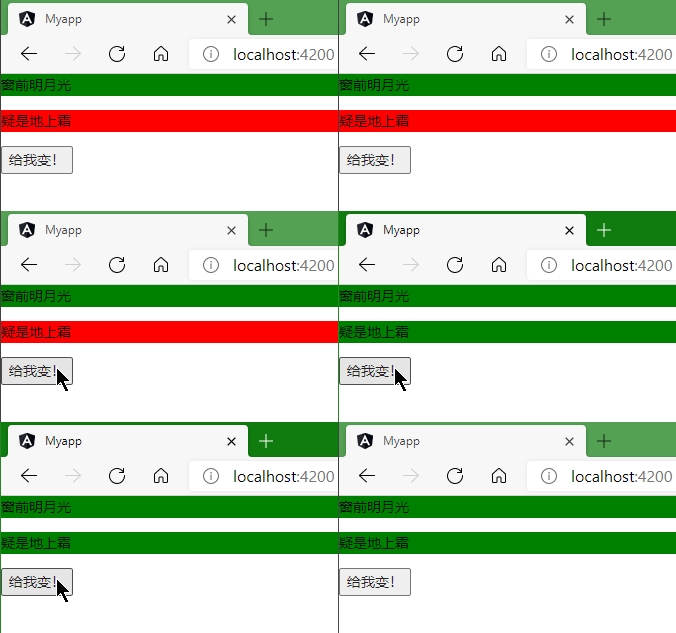
 <div [ngStyle]="{'background-color': isActive ? 'green':'red'}">
        <p>窗前明月光</p>
    </div>

    <div [ngStyle]="{'background-color': username=='admin' ? 'green':'red'}">
        <p>疑是地上霜</p>
    </div>

    <button (click)="change()">给我变!</button>
TS文件:
import { Component, OnInit } from '@angular/core';
@Component({
  selector: 'app-menu',
  templateUrl: './menu.component.html',
  styleUrls: ['./menu.component.scss']

})
export class MenuComponent implements OnInit {
  isActive=true
  username=''

  constructor() {

  }
  ngOnInit(): void {

  }
  change(){
    this.isActive =! this.isActive;
    this.username='admin'
  }

}
效果:

1.4你甚至可以写一个函数
HTML
<div [ngStyle]="{'background-color':changeColor()}">
        <p>窗前明月光</p>
    </div>
TS
import { Component, OnInit } from '@angular/core';
@Component({
  selector: 'app-menu',
  templateUrl: './menu.component.html',
  styleUrls: ['./menu.component.scss']

})
export class MenuComponent implements OnInit {
  constructor() {

  }
  ngOnInit(): void {

  }
  changeColor(){
    return "green"
  }
}
效果:
