0.工具
IDEA 2024.2
MySql 8.0.11
Maven 3.6.3
MyBatis 3.5.2
Navicat 或者其他能访问数据库的工具
JDK 1.8
1.数据库准备
创建一个t_student数据库,并插入3条语句。
CREATE TABLE t_student(
   sid INT PRIMARY KEY AUTO_INCREMENT,
   sname VARCHAR(50),
   sage INT
);
INSERT INTO t_student(sname,sage) VALUES('张三',18);
INSERT INTO t_student(sname,sage) VALUES('李四',19);
INSERT INTO t_student(sname,sage) VALUES('王五',20);
navicat运行截图:

2.环境搭建—POM文件
搭建环境前,先在控制台输入 mvn -v 看一下maven是否正常安装,如果没有安装要先安装maven,否则下面的搭建过程没用用。(建议配置阿里云的Maven仓库)
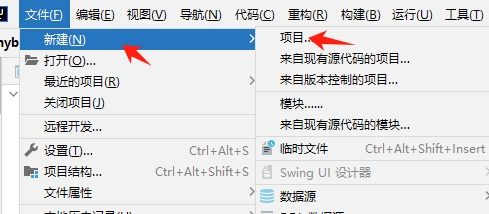
打开IDEA,点击“文件”—>”新建”—>”项目”
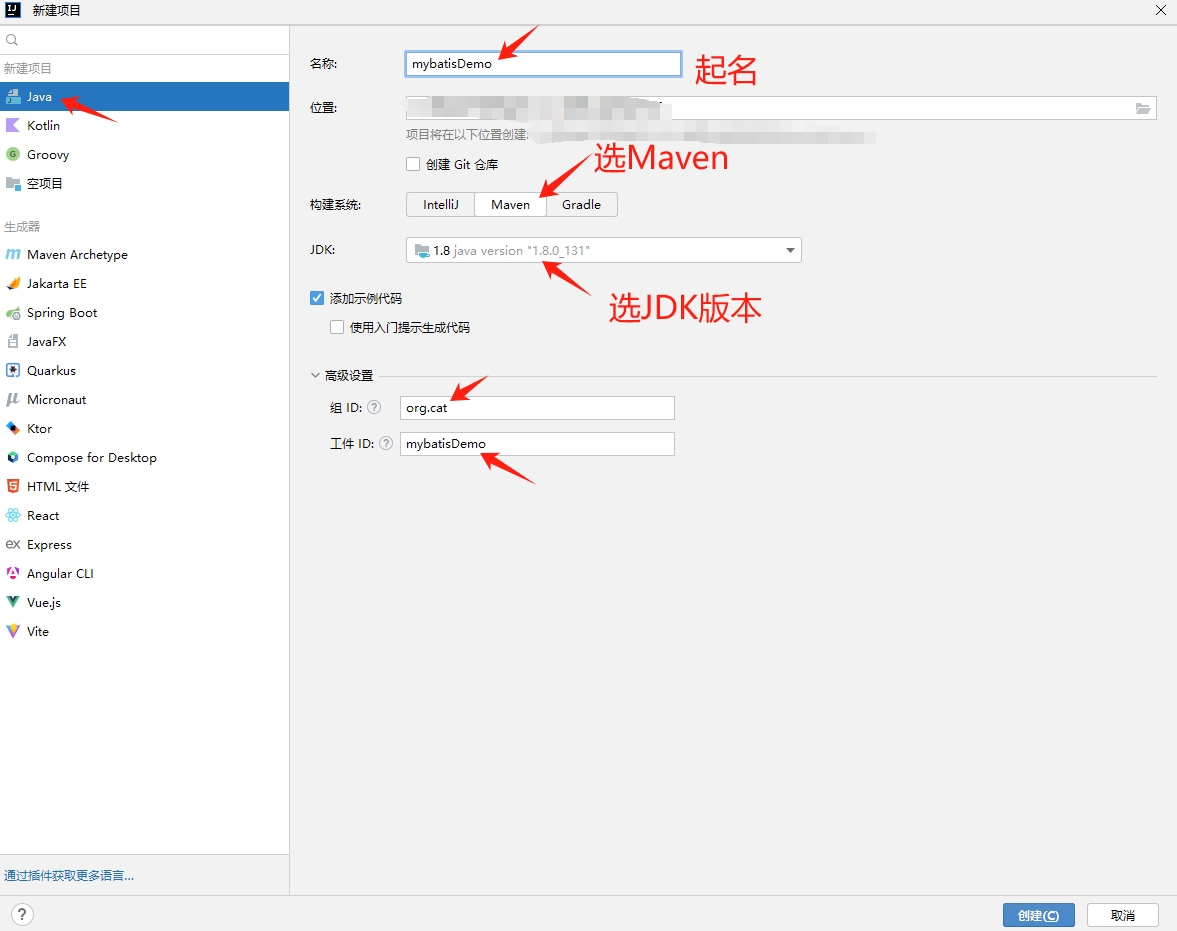
然后创建项目参考如下,填写完必要内容后点击“创建”按钮。
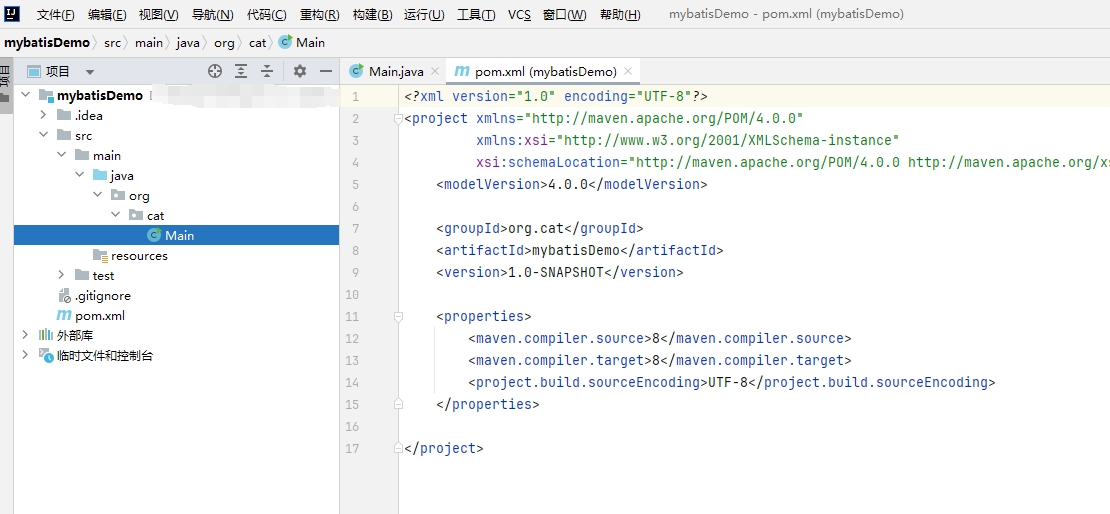
点击创建后,项目初始状态如下:
POM文件添加相应的依赖文件,点击刷新按钮,让maven去仓库里面下载所需要的依赖。
<?xml version="1.0" encoding="UTF-8"?>
<project xmlns="http://maven.apache.org/POM/4.0.0"
         xmlns:xsi="http://www.w3.org/2001/XMLSchema-instance"
         xsi:schemaLocation="http://maven.apache.org/POM/4.0.0 http://maven.apache.org/xsd/maven-4.0.0.xsd">
    <modelVersion>4.0.0</modelVersion>

    <groupId>org.cat</groupId>
    <artifactId>mybatisDemo</artifactId>
    <version>1.0-SNAPSHOT</version>

    <properties>
        <maven.compiler.source>8</maven.compiler.source>
        <maven.compiler.target>8</maven.compiler.target>
        <project.build.sourceEncoding>UTF-8</project.build.sourceEncoding>
    </properties>
    <dependencies>
        <dependency>
            <groupId>org.mybatis</groupId>
            <artifactId>mybatis</artifactId>
            <version>3.5.2</version>
        </dependency>
        <dependency>
            <groupId>mysql</groupId>
            <artifactId>mysql-connector-java</artifactId>
            <version>8.0.11</version>
        </dependency>
        <dependency>
            <groupId>junit</groupId>
            <artifactId>junit</artifactId>
            <version>4.12</version>
            <!--   	        <scope>test</scope>-->
            <scope>compile</scope>
        </dependency>
    </dependencies>
    <build>
        <resources>
            <resource>
                <directory>src/main/java</directory>
                <includes>
                    <include>**/*.properties</include>
                    <include>**/*.xml</include>
                </includes>
                <filtering>true</filtering>
            </resource>
        </resources>
    </build>
</project>

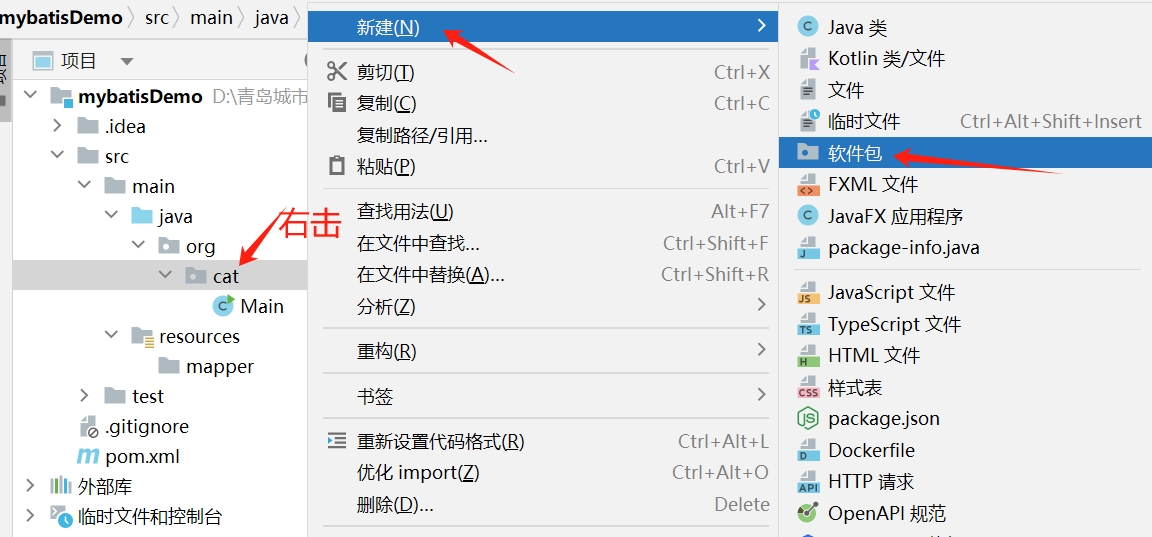
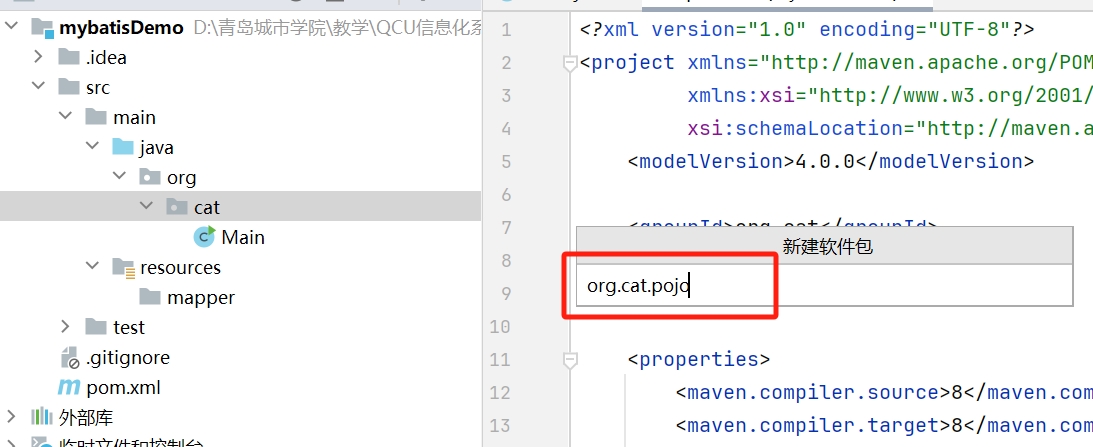
3.实体类创建
创建实体类文件夹和实体类
然后新建实体类Student
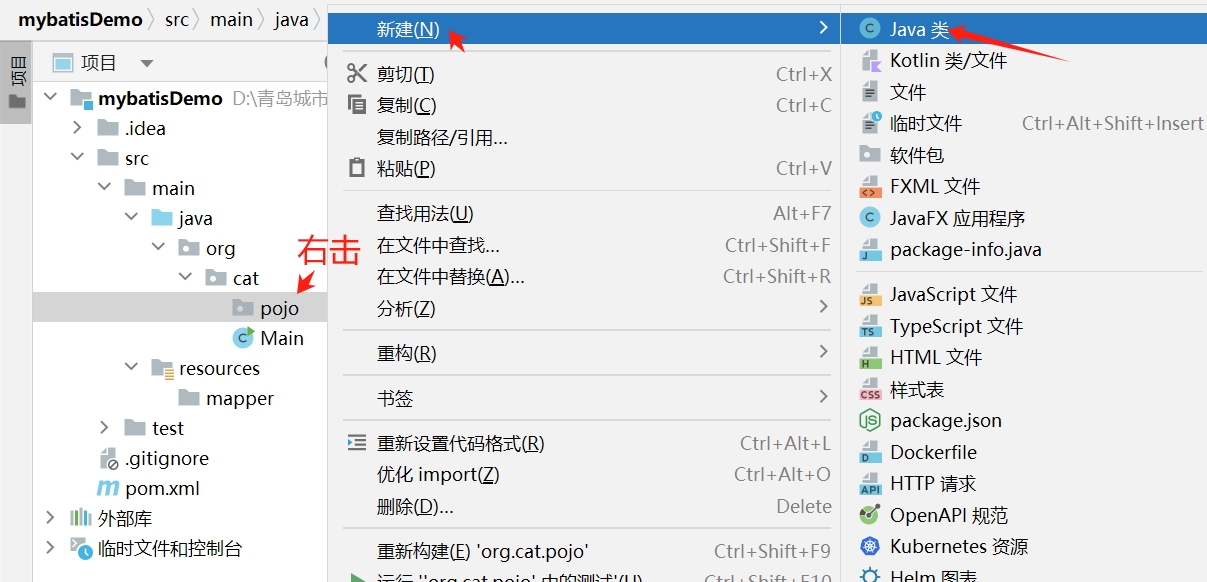
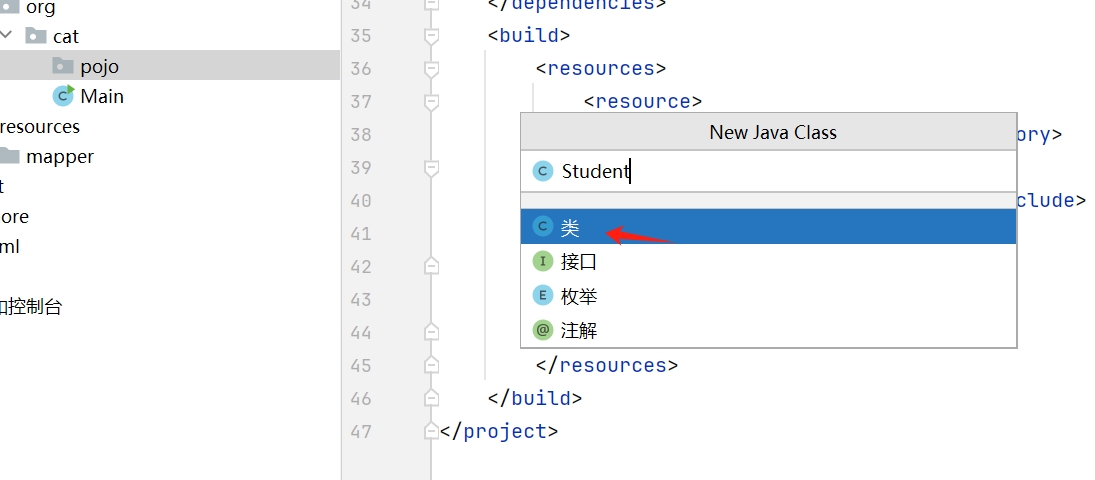
按回车确认。

package org.cat.pojo;

public class Student {
    //学生id
    public  int id;
    //学生姓名
    public  String name;
    //学生年龄
    public  int age;

    public int getId() {
        return id;
    }

    public void setId(int id) {
        this.id = id;
    }

    public String getName() {
        return name;
    }

    public void setName(String name) {
        this.name = name;
    }

    public int getAge() {
        return age;
    }

    public void setAge(int age) {
        this.age = age;
    }

    @Override
    public String toString() {
        return "Student{" +
                "id=" + id +
                ", name='" + name + '\'' +
                ", age=" + age +
                '}';
    }
}
4.mapper文件
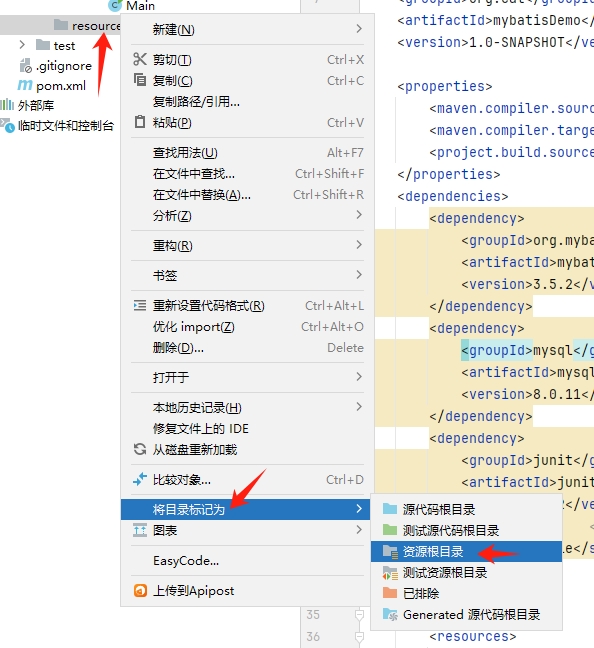
标记根资源。有的时候创建完项目后,并没用识别出resources文件夹,需要手动标记一下根资源。比较简单,右击“resources”—>将目录标记为—>资源根目录
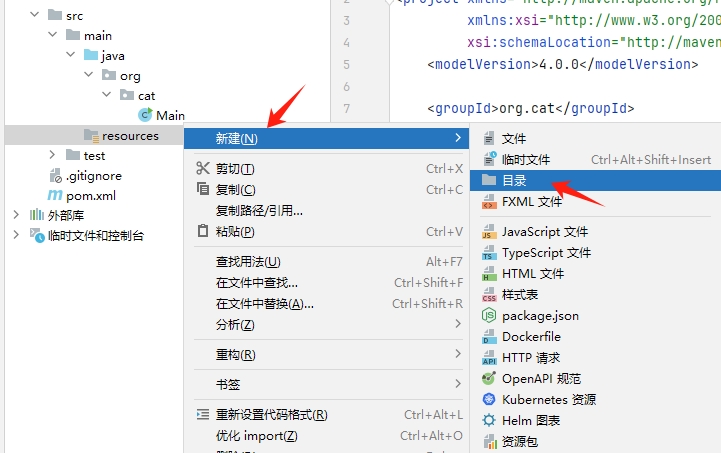
在resources文件夹底下新增一个文件夹(可以暂时叫mapper),用来存储mapper文件
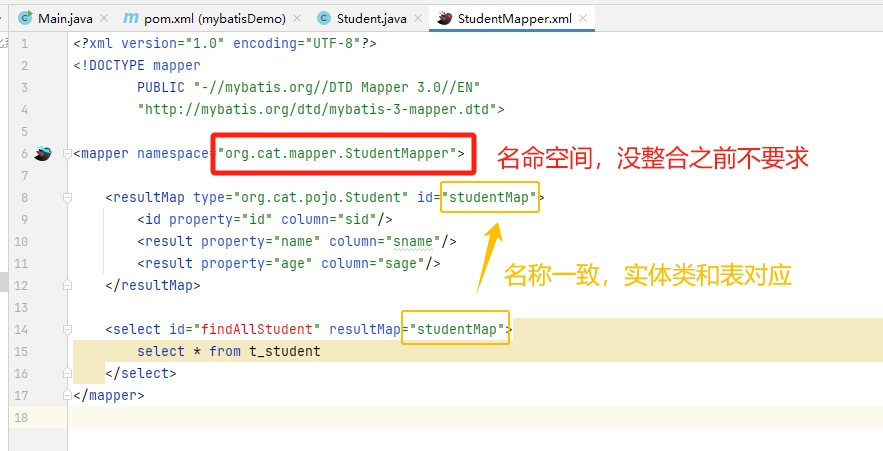
开始编写xml文件。
右击mapper文件夹
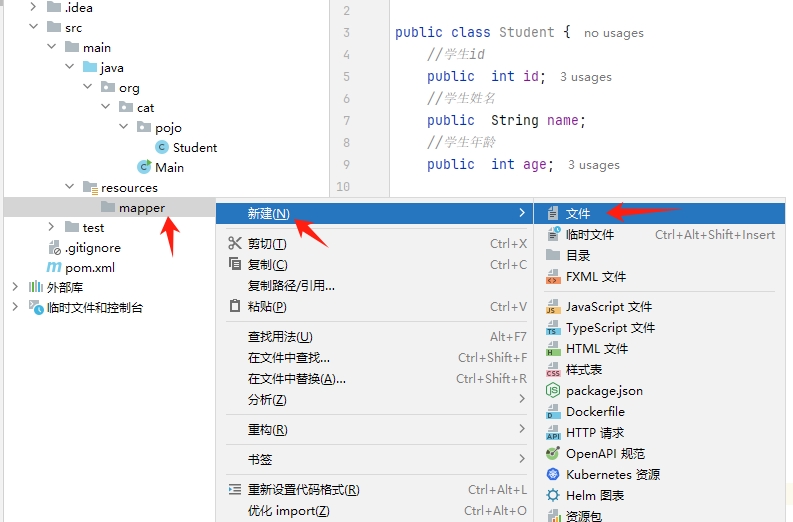
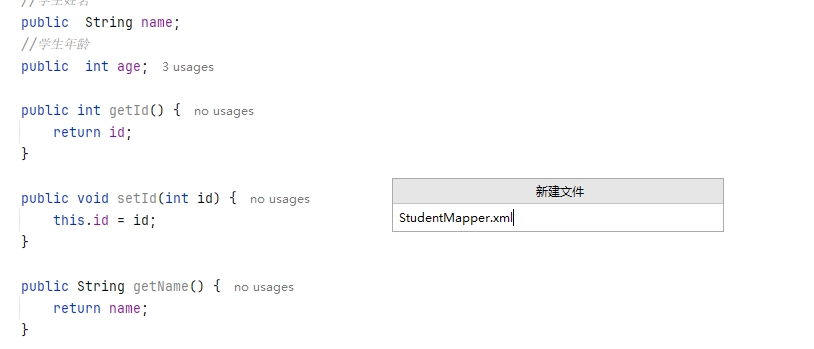
创建完后,添加完相应内容如下:
<?xml version="1.0" encoding="UTF-8"?>
<!DOCTYPE mapper
        PUBLIC "-//mybatis.org//DTD Mapper 3.0//EN"
        "http://mybatis.org/dtd/mybatis-3-mapper.dtd">

<mapper namespace="org.cat.mapper.StudentMapper">

    <resultMap type="org.cat.pojo.Student" id="studentMap">
        <id property="id" column="sid"/>
        <result property="name" column="sname"/>
        <result property="age" column="sage"/>

    </resultMap>
    <select id="findAllStudent" resultMap="studentMap">
        select * from t_student
    </select>
</mapper>
5. 配置文件
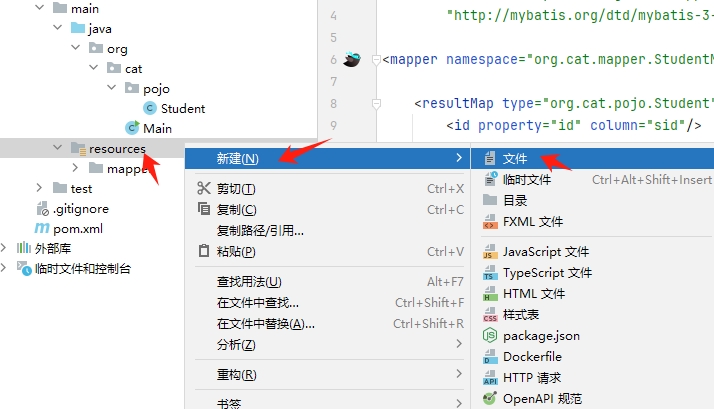
首先配置数据库配置文件。右击“resources”—>新建—>文件
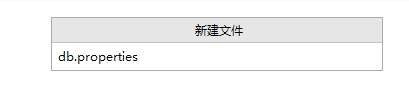
创建结果如下:
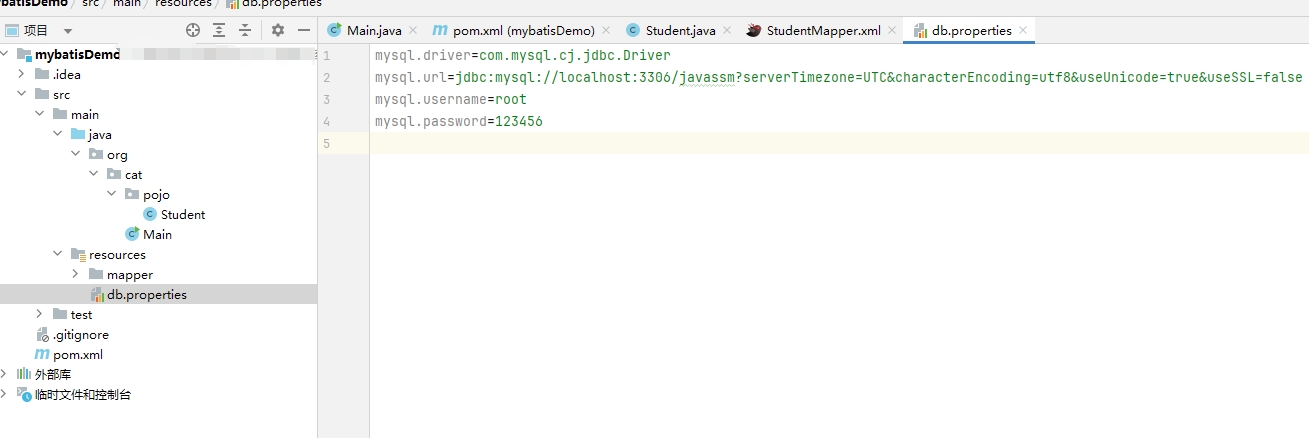
mysql.driver=com.mysql.cj.jdbc.Driver
mysql.url=jdbc:mysql://localhost:3306/javassm?serverTimezone=UTC&characterEncoding=utf8&useUnicode=true&useSSL=false
mysql.username=root
mysql.password=123456
再创建MyBatis配置文件。还是右击“resources”——>新建——>文件,这次输入文件名 mybatis-config.xml
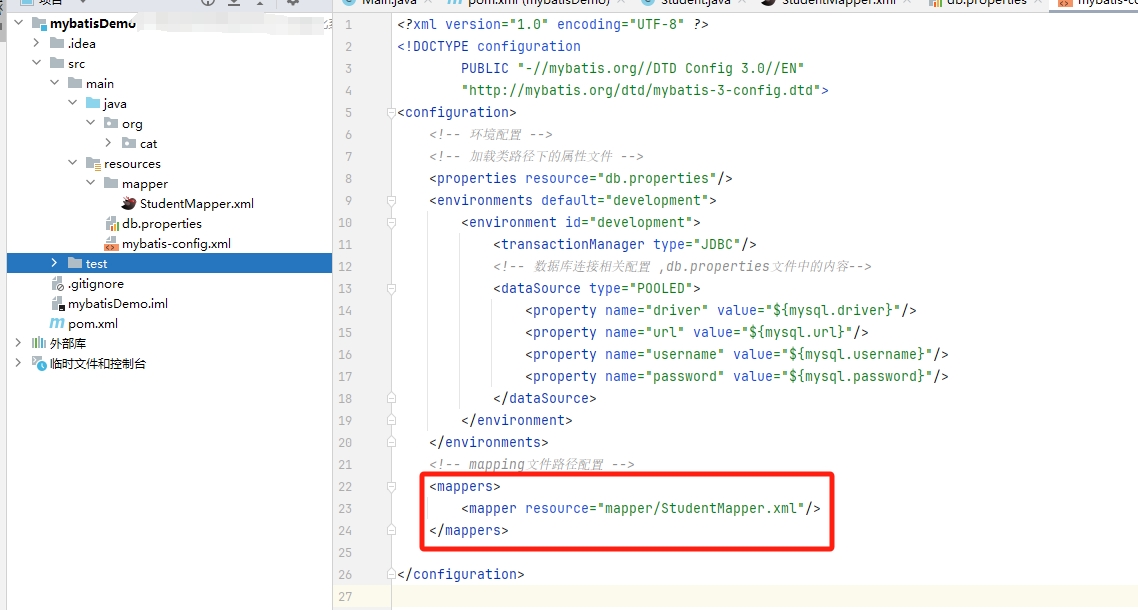
<?xml version="1.0" encoding="UTF-8" ?>
<!DOCTYPE configuration
        PUBLIC "-//mybatis.org//DTD Config 3.0//EN"
        "http://mybatis.org/dtd/mybatis-3-config.dtd">
<configuration>
    <!-- 环境配置 -->
    <!-- 加载类路径下的属性文件 -->
    <properties resource="db.properties"/>
    <environments default="development">
        <environment id="development">
            <transactionManager type="JDBC"/>
            <!-- 数据库连接相关配置 ,db.properties文件中的内容-->
            <dataSource type="POOLED">
                <property name="driver" value="${mysql.driver}"/>
                <property name="url" value="${mysql.url}"/>
                <property name="username" value="${mysql.username}"/>
                <property name="password" value="${mysql.password}"/>
            </dataSource>
        </environment>
    </environments>
    <!-- mapping文件路径配置 -->
    <mappers>
        <mapper resource="mapper/StudentMapper.xml"/>
    </mappers>

</configuration>
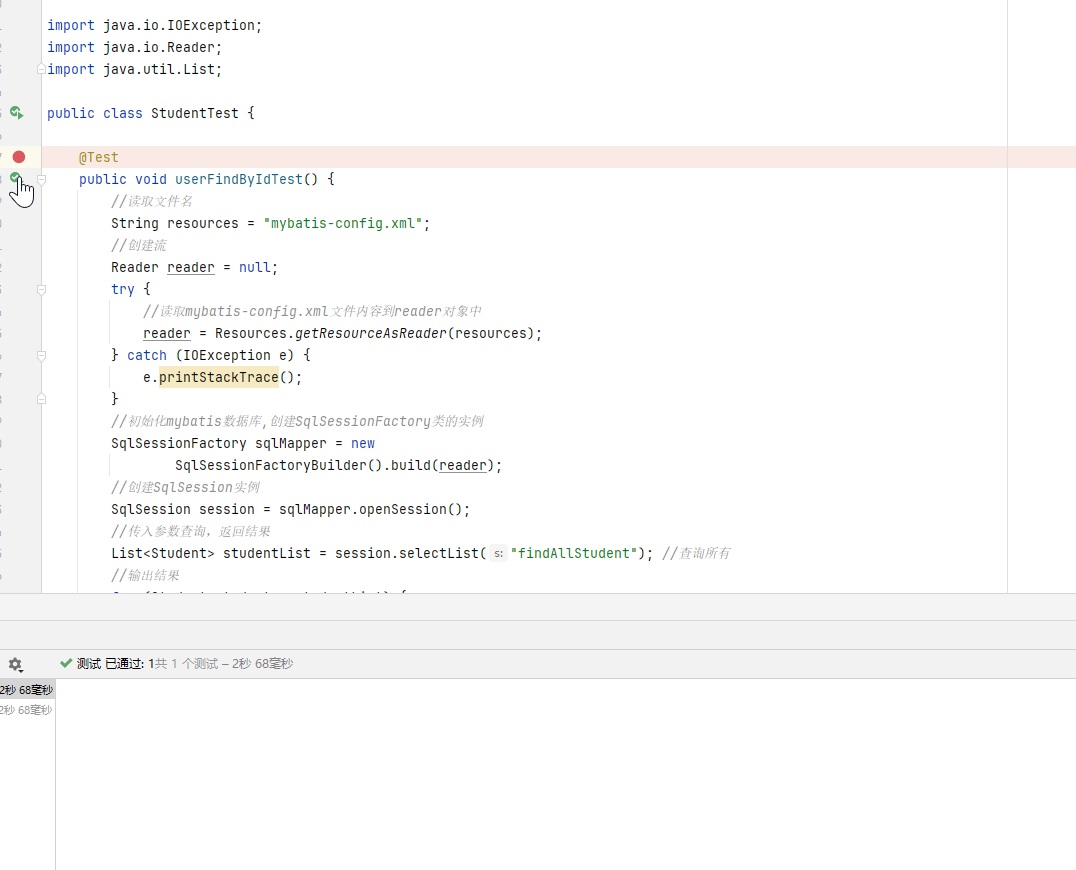
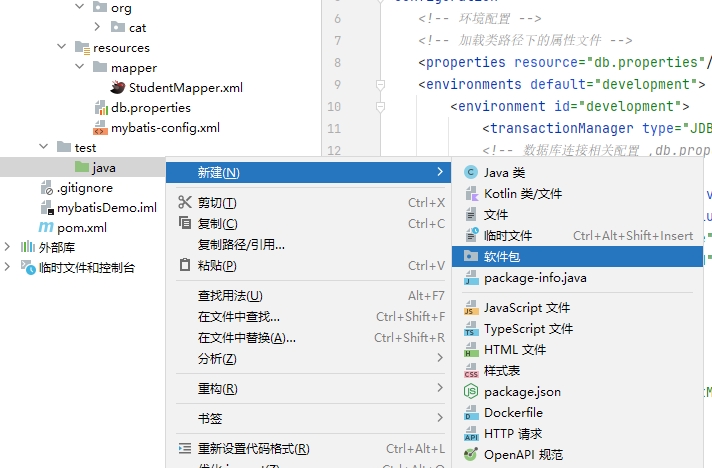
6.编写测试类
我们在test文件夹中创建对应的测试类
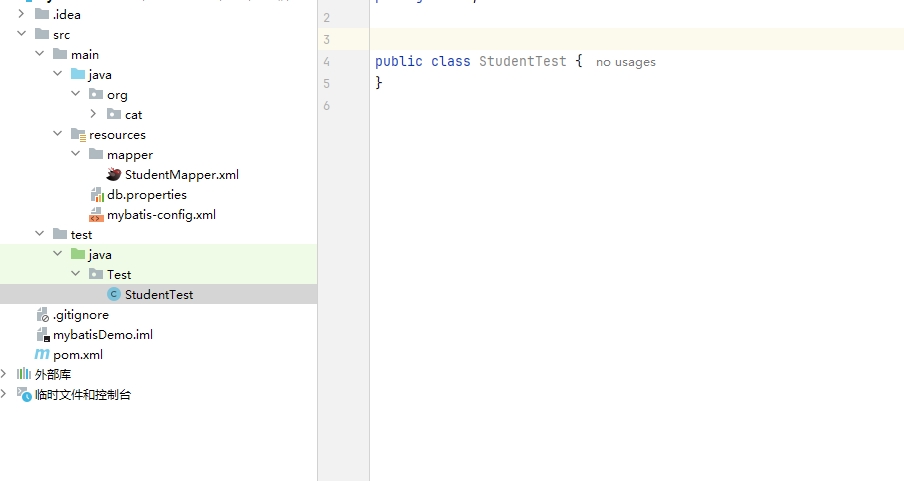
补充测试类 语句
package Test;


import org.apache.ibatis.io.Resources;
import org.apache.ibatis.session.SqlSession;
import org.apache.ibatis.session.SqlSessionFactory;
import org.apache.ibatis.session.SqlSessionFactoryBuilder;
import org.cat.pojo.Student;
import org.junit.Test;

import java.io.IOException;
import java.io.Reader;
import java.util.List;

public class StudentTest {

    @Test
    public void userFindByIdTest() {
        //读取文件名
        String resources = "mybatis-config.xml";
        //创建流
        Reader reader = null;
        try {
            //读取mybatis-config.xml文件内容到reader对象中
            reader = Resources.getResourceAsReader(resources);
        } catch (IOException e) {
            e.printStackTrace();
        }
        //初始化mybatis数据库,创建SqlSessionFactory类的实例
        SqlSessionFactory sqlMapper = new
                SqlSessionFactoryBuilder().build(reader);
        //创建SqlSession实例
        SqlSession session = sqlMapper.openSession();
        //传入参数查询,返回结果
        List<Student> studentList = session.selectList("findAllStudent"); //查询所有
        //输出结果
        for (Student student : studentList) {
            System.out.println(student);
        }
        //关闭session
        session.close();
    }
}
7.测试效果